Dec
01

Using background reference images correctly scaled

By

This is a Blender 2.49 post. Related Blender 2.59 article: Using CAD files as correctly scaled raster image reference

………………………………………………………………….

One important aspect of architectural modelling is getting the right dimensions of a project. Working with a set of blueprints and following the dimensions on paper is one way to do it but it is much more efficient to import some form of reference into Blender. My first choice would have been importing 2d line drawings from my Cad application and try to snap my model to these. I am still working on this option and I will write about it when I’ve reached a satisfying conclusion.

In the meantime I was looking at this really nice tutorial on making a house model in Blender and the method used there is to insert a background image of the house plan, work the model over this as reference and in the end scale the model to fit the real units. The use of an image background seemed OK to me: I tried it and the image visibility and that of the objects is very good but I was not pleased about the lack of precision. You can read more about my precision mania here.

So here is my method of getting your raster background image exactly to scale.

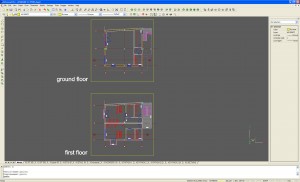
First I prepare my raster images. In my CAD application I draw a rectangle around my plan drawing, sort of like framing it. I take care the horizontal size of this frame to be a nice integer. For instance, if the plan of my building is 11,56 m wide on the x axis I draw a frame 15m wide (I keep a notebook on my desk and write measurements like this down if I’m not sure I will remember them).  The vertical size is not important, it just has to frame the drawing. I zoom until the image fills the screen and make a printscreen or bitmap export of my plan including the frame. This works for small and medium projects. I tested it for up to a 30mx30m plan layout and it was ok. For larger ones the drawing might not be clear when zoomed to fit the window so you might have to find another way to export your raster, or maybe stitch several printscreens.

bricscad setup

Drawing 15mx15m frames around the cad drawings

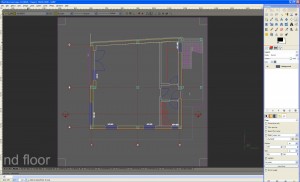
Next step: open the raster image with an image editor and crop exactly around the frame.

Gimp crop around the frame

Gimp crop around the frame

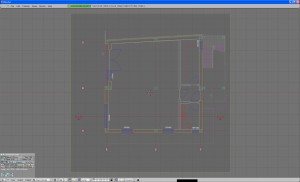
The Blender part: In the 3d window header go to View->Background Image.  A small window pops inside the 3d window with the background image settings. Upload your plan – it will show in the 3d window. Here comes the scaling part: Blender imports any background image with a fixed size, with no relation to the actual size of the image (in pixels or other units). The default blender background has an horizontal size of 2 blender units (like a new plane or cube). There is a “size” input box in the background settings window with 1 as default in which we’ll do the right amount of scaling using some simple math: if my drawing has a real horizontal dimension of 15m and it imports as 2 blender units, using the scale of 1 blender unit = 1 m means the size in the settings dialogue should be 15/2 = 7.5 . Make sure you are in in top view (numpad-7) to display the image.

blender background settings

Blender background size 15/2 = 7.5

Now the plan is correctly scaled and we can start modelling on top of it. We can construct our model freely using the plan as reference or use more precision like numeric input, at least for some elements in the project like window and door openings or wall thickness, this way we can use library elements like windows and be sure everything is fitting nicely.

You can use any number of plan drawings in one file and switch between them, according to the different floors in the project. Just take care the frames are identically positioned around the different plans, so when imported in Blender they show up exactly in the same position. You can also import building elevations and use them in side view (numpad1-3). The frame’s bottom margin has to be aligned at the “Zero” level of the building and in the background settings dialogue for the elevation view you have to insert a y value equal to half the vertical size of the frame to nudge it on the ground level.

Related post: UV mapping an image to a plane as modelling reference
Categories : Modeling
  • Pingback: … Using a UV mapped plane as modelling reference :: Blender Mama()

  • May I be wrong, but reading your texts and seeing here the snapshots from your works in Blender, it seems that you are not using some “tools” that may help:

    1)You can (and must) registry your notes in the own blender file. Just open an text window and type your notes. They will be there as future/cross reference, and evidently you will never more have to keep or search for a piece of paper in your desk (or elsewhere as your baby grows…)

    2)I like precision modeling too, and I always keep an eye in the real scale, dimensions and positoning of every vertice in my models simply by keeping opened the “Transform Properties” – just hit “N” key when the mouse pointer is over the 3D-View workspace.

  • Oana

    Hi, thanks, using the text window in Blender is a great suggestion. The fact is I like using pen and paper at times, not just for taking notes but also for sketching before getting to the computer work, but having the notes saved with the blender files is certainly useful.

    I also use the transform properties window along with other tools. I started here a list of Blender precision tools, but I’m sure it is not complete, I’ll be glad to receive new suggestions.

  • roofoo

    Good tips! But in the US we use feet and inches, not meters, so it can get kind of difficult scaling with precision.

  • Oana

    Roofoo: it’s very interesting what you’re saying. Can you explain some more? I worked for some time for US clients and of course I hated feet and inches 🙂 and I had some difficulties but as I used cad drawings I worked from those files directly so I managed. I thought somebody used to the US system will not have any problem!!!!

  • roofoo

    Well, when you have 12 inches in a foot, and inches divided into 16ths, you can’t input fractions very easily in Blender, it’s more suited to the metric system since it’s based on 10. It just gets very confusing. 😀 I suppose if you can import a CAD file into Blender it’s better, but still it would be nice to be able to enter Feet and Inches and fractions directly into Blender. 🙂

  • Oana

    Oh, I see what you mean!

  • Oana

    Roofoo: ..I’m still caught in this problem… I was looking for some workaround using the grid settings; would it be ok to skip the fractions? 🙂 I don’t often use details smaller than 2.5 cm

  • roofoo

    Well, fractions add up. A quarter inch off here and there will get things misaligned, so things won’t be accurate. In the long run it saves time to just enter in your dimensions correct the first time, rather than try to fix things at the very end. :O

  • toweyed

    roofoo: Why not use a free web conversion program or do your own conversion in a spreadsheet. Then you can have your project referenced to ft n inches n qtrs n 16ths with the resulted input in metric?

    When the client says we need to knock 7′ 3/4″ off that height, then you can enter it into your spreadsheet AND get the client to sign off on the request. Quick, efficient and referencable.

    1 foot = 0.3048 meters
    1 inch = 0.0254 meters

    1 meter = 3.2808399 feet
    1 meter = 39.3700787 inches

    Hope this helps. There might even be a way to put the equation and result into python as a mini-app. I would not know how to do that.

  • Oana

    What a good discussion! Toweyed: I was just digging on the web with hope a python application for this might already exist but I didn’t find anything yet. Your suggestion about using a separate convertor sounds good to me but maybe it’s a bit tedious if you have a lot of numeric data? Something integrated in Blender would be best. Other suggestions I found also ignored the bothersome fractions 🙂 I’ll keep looking!

  • roofoo

    Yes, what I have done in the past is use an architectural calculator to enter in ft/in then convert to decimal and use 1 blender unit=1 foot. Then if I needed to convert the drawing to metric I could just scale everything at once. It does get a bit tedious though, like you said.

  • Oana

    I have a new post on this here.

  • Pingback: Imperial units in Blender 2.5 :: Blender Mama()

  • car313

    Would the author be kind enough to upload a tutorial for preparing car blue prints for blender 3d for use as background images? (whew! that was a long sentence)