UV mapping an image to a plane as modelling reference
ByIn a previous post I have described how you can use a reference image as a viewport background in the 3d view and scale it correctly.
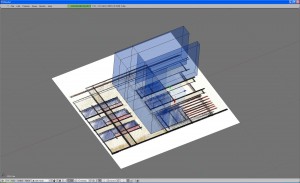
Today I wanted to try a different approach and get my image reference in by mapping it to a plane and turning textured view on in my viewport. This is something I have often used when working in other 3d software and has some advantages, as I can easily position and scale my plane. In modelling for architecture this can be used to bring as reference into Blender cad floor plans, sketches or photographs and easily place them where you need them.
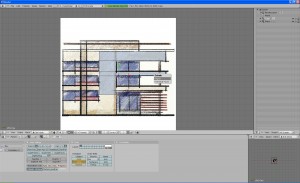
This is what I wanted to get:
All I had to do before was to assign the textured material to my plane but in Blender it took me an hour to figure it out. This is mainly because I didn’t think UV mapping was needed for architectural projects and I didn’t bother to look into it before. The first thing I discovered was that only textures mapped the UV way showed in the 3d viewport. So I went to the documentation to learn UV mapping. All the sources I found have complicated explanations and examples as UV mapping is usually for objects more complex than a one-face plane and I didn’t for instance need to make seams. Then I spent time wondering where my UV-edit mode had disappeared until I found out the documentation I was reading was outdated and there is no UV edit mode in Blender 4.9. Then I managed to do something and got the impression I had my plane UV mapped as it showed correctly in my render but I could still not see it in the 3d window. I was starting to think OpenGL was broken when I finally hit the right buttons and got what I wanted. This is one thing I am learning about Blender, you must keep faith that anything can be achieved and keep digging 🙂
Actually it’s very simple. Here’s how to do it without having to know much about UV mapping:
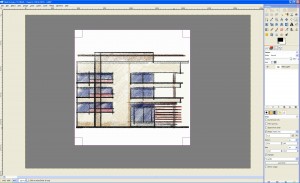
1. Prepare the raster image in your image editing software. I used a digital hand drawn architectural sketch of a small apartment building elevation.
Resize it if needed (keep it just large enough to keep the details nicely visible) and crop to make it square (add some background if needed)
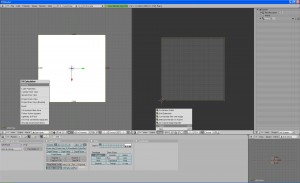
2. Split a new Blender window and set it to UV/image editor
3. Set the 3d window to textured shading mode
4. Add a plane and get into Edit Mode
5. Pres U-key – the UV calculation menu appears – select Unwrap. This brings your plane into the UV editor
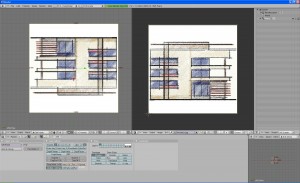
6. In the UV/Image editor window go to the Image menu -> open and get the raster image you want.
7. Now you should see the image on the plane in the 3d window. For some reason it appeared upside down but let’s not worry about it, just rotate the plane by 180 degree
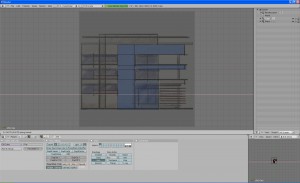
Now you can move, rotate or scale the plane the way you want. When you will try to edit geometry on top of it as reference you might not like the fact that you are in textured view mode so your objects are solid and you can’t see the image through them. Select the object you are editing and go into the Buttons window to Object (F7) -> Draw panel and select Drawtype Wire. Now you have the image on the shaded plane and the transparent wireframe geometry to work on. Don’t forget when you’re done to switch the geometry back to shaded.
To improve the visibility on what you are doing you can also adjust the image contrast/colors back in the image editing software (as you see I used Gimp) or in Blender if you are familiar with node editing.
Note that I never touched the Materials settings, all the texturing is done in the UV/Image editor.
Any number of planes can be added to the file and you can turn their visibility and renderability on/off in the Outliner window. You can also put them on a separate layer.
Well now I know how to UV map… just a little bit… 🙂


Pingback: Using background reference images correctly scaled :: Blender Mama()