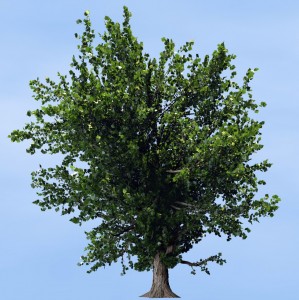
Trees: Arbaro and Ngplant comparison
ByI’m growing trees! I feel like Mother Nature 🙂
The tree week in Nature Academy is a bit different. For the rocks and grass the recipes were rather straight. But trees are more complex matter and I didn’t perceive the tutorial like a clear cut solution, more like a starting point as people try to get more realism, pruning the tree to their computer capability and looking at other tree-creation software. Fortunately my computer handles the more heavy settings and didn’t crash at all, just slows down at certain points. I managed to follow the tutorial, but straying from its exact settings to get a personal image seems more difficult than with the first ones.
Rather unexpectedly I ended up using Ngplant for creating my first tree instead of Arbaro as recommended in the tutorial. Both applications are very good and they do make trees. Actually there is a third one that might just be the best, it’s an addon for Blender called Sapling. I didn’t have time to install and try it but I read some good reviews. The addon it’s still in development and might lack some features but I hope it will develop more and be added to the Blender trunk. I’ll test it as soon as I have some more time. For now I can make a quick Arbaro Ngplant comparison.
– Arbaro’s plus point is the fact that it generates a tree really easy. I mean any settings you apply it is bound to look more or less like a tree. But then to get a certain result you must fiddle for ages with the settings.
– Ngplant first generates a spiky ..thing. Then to get a certain result you must fiddle for ages with the settings…
– Arbaro does not make a complete tree preview, you see a wireframe for the different levels of branches, no zoom, and only after importing into Blender you get to see the result properly. I found this a major setback – after I got some leafless trees and some branches weirdly curving into the ground.
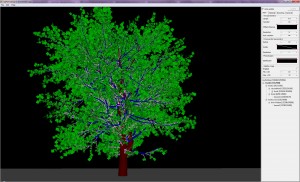
– In Ngplant you can see the whole tree, in a simple solid mode, hide parts of it, and you can pan, rotate and zoom into it. When you change the random seed you can see the results and choose what looks best.
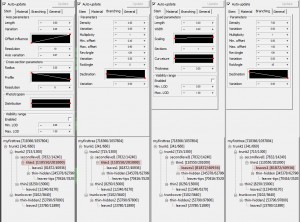
– Numeric input seems better in Ngplant.
– Arbaro makes several types of leaves and seemingly ads UV mapping to them. But in Blender the mapping appears distorted and you have to move vertices around to fix it, it’s not too big deal but with a large tree my computer gets too slow to do this. So for Arbaro seems better to just leave the generated leaf shape alone, from a distance it looks well but in closeups less so.
– Ngplant generates different types of leaves as well but I used rectangular planes on which I could apply a leaf image with alpha, worked very well. I think the results are more realistic but I’m not sure there are not light/compositing situations in which all those alpha planes will fail to work well.
– Couldn’t find a way in Arbaro to vary the size of leaves, they are all the same; in Ngplant you can scale them along the branches.
– The tree shape from Arbaro might be more realistic, with its splitting settings. But Ngplant seems to me more flexible and offers more control over the tree creation. Branches can be scaled and twisted more easily.
There is a nice page here related to Ngplant – Yorik’s Blender greenhouse
The above points might not be that accurate and complete. I only fiddled for a couple of days with the applications. Please use the comment section and help me if I missed some useful point!
Back to my tree, here is a ngplant screenshot and some highlighted settings:
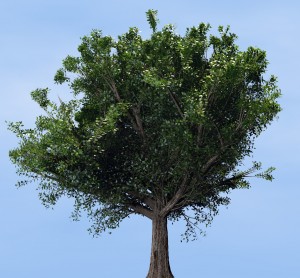
And an Arbaro tree I’m not too satisfied with:
I’m really interested in beautiful and realistic trees because it is the standard now in architectural visualisation made with various commercial software. It is one of the things that moves an architectural rendering from ok to professional. Until now I have used cut trees with alpha channel, mapped on planes. This works well because it’s not heavy on computation and if you have a nice collection of photographed trees (I had to buy some) the results in the scene will be satisfying. Blender has an import feature now called Image to planes that make inserting trees this way very easy. Drawbacks: cutting real tree photos well is a tough job so it’s tricky to find good hi-resolution ones especially budget. Mixing different quality of photo trees in one render can give the game away, also having the plane at a wrong angle to the camera or reflected at a wrong angle into windows. Shadows might feel wrong or the intersection with the ground. The lighting on the tree can be wrong for the scene and you can’t get much variation from one photo, just scaling and maybe changing the colours. Sometimes a bit of postprocessing helps but then you feel tempted to put the trees directly in Gimp and stop bothering about having them in Blender.
So there is reason to try 3d trees. For small light trees they might work in the scene directly. Or you can make your own custom hires collection of cut-trees with whatever light and variations you need.
So now back to Blender to add some scenery for my new tree!
…………………………………..
Ngplant tree file below:
-
Carrozza
-
Oana
-
Sim
-
Gareth
-
Saurabh
-
Oana


