Currently blending…
ByOn and off I have been working on a friend’s project. Luckily he wasn’t in much of a hurry…
It’s a small family house to be built near Bucharest.
I’d rather model any project myself but this model was already built in cad and transferred to max, so I used a 3ds max export – just to see how can I use an imported model. It opened wery well in Blender, keeping object names. If correct settings are set when importing in max from autocad, you can have objects derived from layers, using the layer’s names. No errors appeared on the meshes, so I was set to go with a blank canvas.
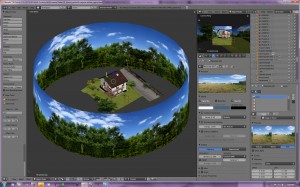
This project was really useful to me. Not bothered with modelling, I could directly test various light setups and this is the one that seemed to work best:
Every time I start on a project I seem to discover new stuff, so probably “I’m not there yet” – that is, to the perfect Blender Internal external lighting scheme – but I like the results so far.
Explanation for the cylinder with scenery on it: I put it there for the reflections in the windows, I didn’t yet find a simpler way to use a background image mapped to view and have a nice reflection from it. The cylinder is on a different render layer, just for reflections. One problem remains, because I have a “sun” light, it casts shadows and I had to position it carefully so the shadow doesn’t appear in my scene. If I solve this maybe I write a more detailed post about this setup.
Setting the environment light to “sky texture” added a great deal to the light, giving some extra nuances to the shadows, looks almost as GI. There was recently some talk in the blender blogs about something called HDRI. This is not it! but some things I read in those posts (and the readers replies) got me to this very useful setting. I think this is actually called IBL (image based lighting).
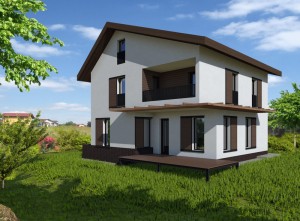
This is the current project stage, neat deserted little house in an overgrown garden:
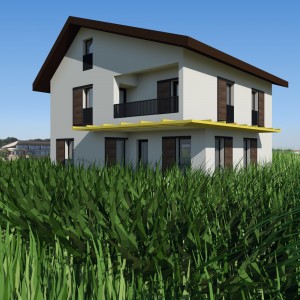
So as you can see I have been experimenting with particles grass, wich is really neat but difficult to setup. Actually I managed to do a bit of gardening, with various results:
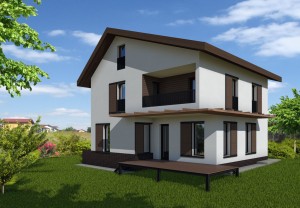
And here was a better one from last week, only then I wanted to try the particles brush and completely messed it up!
So, next I’ll be gardening! Going once again over the grass thing and arranging the plane trees better. The scene also lacks some life, I have to find or model some nice garden furniture and have someone relax on the well kept lawn 🙂
Blogging time over for now!
-
Ahmad
-
Oana
-
Nick


