Generated Mapping and Texture Space
ByIn a nutshell: use Shift+T, G, S and axis constraints to move and scale the Texture Space and position a tileable texture with Generated Mapping. Find precision Texture Space settings in the object data panel.
Long version: generated mapping sounds a bit simple but simple is beautiful and most important, useful.
This is the default Blender mapping mode, so if you add a texture to an object you’ll find it’s already set there in the mapping panel, just change it to “cube” if your object is more than a floor and has any vertical surfaces.
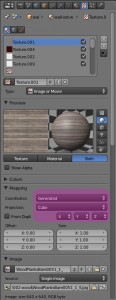
The Generated mapping projects the texture onto the object from a rectangular box in 3d space, so a good use for Generated mapping is any architectural building part that has a standard orthogonal shape, or even some slight non orthogonal faces if the map doesen’t get much noticeable distortion when projected at an angle. Some wood grain for instance can stretch a bit without looking wrong.
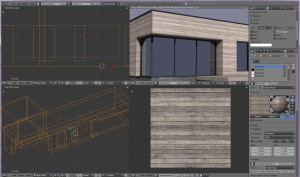
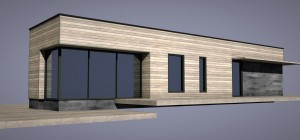
The small house clad in wood I’m working on now it’s a fairly standard example of an architectural mapped object. I want to use a wood siding texture from cgtextures. I just edited it a bit to get rid of a couple of visible contrasty details in the wood which would have made the map repetition obvious. I want the wood to align nicely with the upper and lower part of the windows. I also made a separate object around the big corner windows for some light tricks I want to try, and I want this part to have the same scale and alignment with the rest of the walls.
Now to the best part, the hidden secret of generated mapping in Blender: Texture Space. This is a hidden box assigned to each object, the size and position of which determines the placement of the texture. The “generated” term comes from the fact that each object starts with an auto generated texture space, aligned to the 3dspace global coordinates, that is the same as the object bounding box. To make it visible you can press shift+T or check Texture Space in the Object tab -> display. A dotted line box will appear. Texture space can then be adjusted to fit your texturing needs.
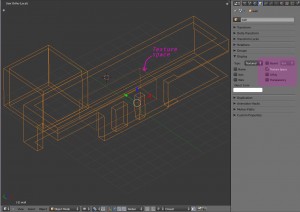
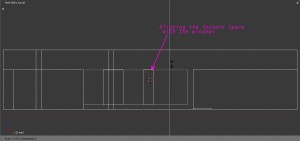
The methods for handling the Texture Space box could be better. You can feel somehow that this part of Blender has been a bit unloved. But you have just enough control over it to get neat results. To move and scale it interactively you press shift+T, then G or S. You can also use axis constraints. To scale it on the z axis you go like this: Shift+T – S – Z. Unfortunately you can’t correctly see your texture in the viewport except in flat mapped objects like floors, with the SGSL display option, for cube mapping you’ll have to render to check the results. However, I know exactly where I want my texture to be, so I will scale and place it in wireframe mode, like this:
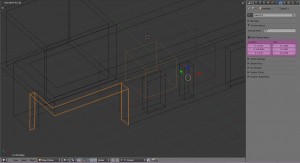
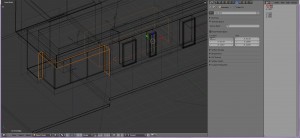
To map the second object I can scale and move it’s texture space like before until it matches the first object’s texture space. But maybe I need to do this in a more precise way; for instance, if two objects meet at an edge, any small misalignment of the maps will show. So for this I will use the settings in the “Object data” panel -> Texture Space (you won’t believe how much time it took me to notice this settings existed!) – where you can exactly adjust the size and position of the Texture Space box.
To get the same mapping I will copy/paste the settings from one object to the other.
Unfortunately I didn’t find a direct way to copy all mapping settings from one object to the other, I just copy-pasted them one by one. To make it a little better I opened a text window on the side and copied all numbers from the wall object first, so at least I won’t have to jump from one selection to the other six times. A small addon to copy texture space coordinates between objects would be a neat idea.
I also tried to figure out the texture mesh option in that panel but couldn’t understand how it works. Setting a different mesh as texture space input looked in my test same as auto texture space. Would be happy if someone had some idea on this.
Back to the subject, this settings can also be used to scale a texture to match the exact proportion of the map or to scale a texture to real size, for instance a floor covered in 30×60 tiles, without having to make other calculations.
So here is the result, all wood aligned as intended:
You can spot the tiling if you look closely but I think it’s OK.
Other points on Generated Mapping:
There is just one texture space for every object so if you want to mix textures scaled differently you can position one with the texture space, the other by changing the repeat and offset settings. For instance you can use a large map with some dirt on the auto texture space and use repeat on the actual cladding texture. Didn’t try this but I think you can mix Generated mapped textures with UV mapped textures – to get a graffiti on a brick wall or instance.
There is a related mapping method that sounds good – Object mapping, which takes another object’s mapping coordinates so you can adjust the mapping by changing that object. I tried hard to use it before discovering the Texture Space thing but I got really buggy results, like one render showed the texture well and a later render on the exact same scene showed the texture gone mad. No idea if I missed something or it’s a known issue or will it be fixed as I couldn’t find any other reference to it in the Blender community.
There is also a modifier that uses projections from cameras to adjust tiled mapping but it also gave me buggy results.
Plain generated mapping seems to work without fail, I hope it stays like this in the following Blender releases.
-
Carrozza
-
Oana
-
Jon
-
Bhavana
-
RudyD
