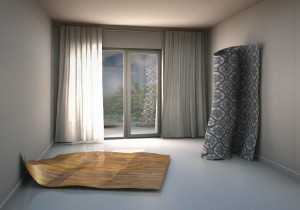
Blender UV and Generated mapping in architectural visualisation
ByMapping a texture on an object means arranging the way a texture assigned to the object covers it, its scale and orientation. For me it’s like pasting wallpaper to something, or gift wrapping, only 3d has a few more options like scaling and repeating and, of course, “undo” 🙂
There are two main methods of mapping textures in Blender: UV mapping, using the UV editor module, and Generated mapping, that just repeats the map on the object in 3d orthogonal space. I noticed there is a tendency to consider the more complicated UV mapping the “better way” and the “generated” mapping an obsolete method for those who don’t know how to UV map. Actually, this is a wrong point of view. The two methods are different and serve different purposes, and in architectural visualisation both are needed.
UV mapping is used in 3d art to texture things like people, aliens, dinosaurs, large spaceships that have wandered through space and gathered rust and dirt and all kind of stuff like that, because you can display and handle the object faces like a canvas and make a custom map that will fit each object to perfection, and you can even paint directly on it in Blender. On such objects, a texture that is repetitive and too uniform looks lame and unnatural.
Instead, in architectural visualisation you often have to use tiled textures and uniform areas of materials, as archviz usually depicts new and clean buildings covered in modular panels or bricks or stuff. The realistic unevenness of the surfaces must be very subtle, resulting mostly from light variations, and your client doesen’t want to see dirt or worn surfaces or cracked walls. In some cases the scaling and alignment of the map must be precise, if the client needs to check how the cladding module really fits the design. For this kind of mapping is difficult to use UV unwrapping, and almost impossible if the object – that is, building walls – is large with many openings and detail. UV mapping does not work well on “auto”, so you have to make tons of seams and selections on all parts of the model and experiments showed me that precision is difficult to obtain. Then, if you do manage to get a result this way, making ulterior changes to the mesh can mess up the UV mapping so you’ll have to do it over again.
Instead, generated mapping is easy to scale and align and will not be affected by changes to the model. And you don’t have to avoid tiled maps to get a realistic and professional result, they just have to be very good tileable maps and use some tricks to avoid the “bathroom tile” look. One thing you will have to live with in Blender at this time is the lack of interactivity in generated mapping, that is, mapped textures won’t show in the viewport as in UV mapping, so you’ll have to render to see it. However, being able to precisely scale and position the map kind of makes up for this.
UV mapping is useful in archviz for stuff like furniture or special items that resemble at heart the aliens and spaceships and need to be treated with a large custom map, or have such particular geometry that rectangular projections won’t work well.
I would say I need to use generated mapping more often than UV, so I’ll go there in the next post.
-
Tim
-
Oana
-
Tim
-
Oana


